If you’ve been chasing the promise of large language models (LLMs) but don’t want to hand‑off your data to the cloud, you’re not alone. With the rise of open‑source LLMs and powerful container runtimes, you can spin up a full‑featured chatbot on your own laptop or workstation in minutes. This post walks you through:
- Installing Ollama – the lightweight containerized runtime that ships dozens of LLMs.
- Setting up GPU‑accelerated inference on NVIDIA and AMD cards.
- Pulling and running the gpt‑oss:20b model locally.
- Building a simple, live chat UI with Streamlit that streams the model’s output.
TL;DR – Docker → Ollama → gpt‑oss:20b → Streamlit → Chatbot
Large Language Models (LLMs) like gpt‑oss, qwen, LLaMA, Phi-3, and others have revolutionized AI, but running them on cloud platforms can be expensive and raise privacy concerns. Enter Ollama—a powerful tool that simplifies deploying LLMs locally, even on CPU-only systems. In this blog, we’ll walk through setting up Ollama on a CPU, explain the benefits of local LLM execution, and highlight why this approach is ideal for experimentation, cost savings, and security.
Why Run LLMs Locally?
- Cost Efficiency
Cloud providers charge hefty fees for running LLMs, especially for large models. By running models locally, you eliminate recurring costs and save money, especially for experimentation or small-scale projects.
- Data Privacy & Security
Sending sensitive data to external servers poses risks of data leaks or misuse. Running LLMs locally ensures your data stays on your machine, making it ideal for industries like healthcare, finance, or research where privacy is critical.
- Experimentation Freedom
Local setups allow you to tweak hyperparameters, test model variants, or fine-tune models without relying on third-party infrastructure. This flexibility is invaluable for developers and researchers.
- No Dependency on Cloud Providers
You’re not tied to any cloud provider’s API limits or service outages. Your LLM runs entirely on your hardware, giving you full control.
Prerequisites
| Item | Minimum | Notes |
|---|---|---|
| Docker Engine | 20.10+ | Linux, Windows, macOS |
| GPU (optional) | NVIDIA RTX 3080 or higher | For GPU acceleration. |
| Python | 3.9+ | Needed for the Streamlit UI. |
💡 Tip – If you’re on Windows, install Docker Desktop. On macOS, Docker Desktop works too, but you may need to enable “Virtualization” and “GPU Passthrough” in the settings.
1. Install Ollama
Ollama is a tiny Docker image that bundles the model runtime, API, and a minimal CLI. It works out‑of‑the‑box on CPU or GPU.
CPU‑Only (Docker)
docker run -d \
  -v ollama:/root/.ollama \
  -p 11434:11434 \
  --name ollama \
  ollama/ollama
- \ -v ollama:/root/.ollama – Persist your model downloads across container restarts.
- \ -p 11434:11434 – Ollama exposes its REST API on port 11434.
GPU‑Enabled
\ ⚠️ The steps below assume you’re on Linux. Windows users can follow the same Docker commands – just install the NVIDIA Container Toolkit (or ROCm) on your host first.
NVIDIA GPUs
- Install the NVIDIA Container Toolkit https://docs.nvidia.com/datacenter/cloud-native/container-toolkit/latest/install-guide.html#installation
curl -fsSL https://nvidia.github.io/libnvidia-container/gpgkey \
    | sudo gpg --dearmor -o /usr/share/keyrings/nvidia-container-toolkit-keyring.gpg
curl -s -L https://nvidia.github.io/libnvidia-container/stable/deb/nvidia-container-toolkit.list \
    | sed 's#deb https://#deb [signed-by=/usr/share/keyrings/nvidia-container-toolkit-keyring.gpg] https://#g' \
    | sudo tee /etc/apt/sources.list.d/nvidia-container-toolkit.list
sudo apt-get update
- Install the NVIDIA Container Toolkit packages
sudo apt-get install -y nvidia-container-toolkit
Install with Yum or Dnf
- Configure the repository
curl -s -L https://nvidia.github.io/libnvidia-container/stable/rpm/nvidia-container-toolkit.repo \
    | sudo tee /etc/yum.repos.d/nvidia-container-toolkit.repo
- Install the NVIDIA Container Toolkit packages
sudo yum install -y nvidia-container-toolkit
Configure Docker to use Nvidia driver
sudo nvidia-ctk runtime configure --runtime=docker
sudo systemctl restart docker
AMD GPU
Start the container
Use the rocm tag and expose the ROCm devices:
docker run -d --device /dev/kfd --device /dev/dri -v ollama:/root/.ollama -p 11434:11434 --name ollama ollama/ollama:rocm
2. Pull and Run a Model
# Pull the 20B gpt‑oss model
docker exec -it ollama ollama pull gpt-oss:20b
Tip – Use ollama list to see downloaded models, and ollama rm
to remove them.
Run a Model
docker exec -it ollama ollama run gpt-oss:20b
You’ll see a prompt (>) waiting for input. Try asking a simple question:
> What is the capital of France?
The capital of France is Paris.
3. Build a Streamlit Chatbot UI
Now that the model is up and listening on localhost:11434, let’s build a live chat interface that streams responses in real time.
Package Dependencies – Install Streamlit, requests, json, and ollama library :
You can use requirements.txt
streamlit==1.30.0
requests==2.31.0
ollama==0.5.1
Streamlit Chatbot Code
# ----------------------------------------------------
# Imports
# ----------------------------------------------------
import streamlit as st # The web‑app framework
import requests # To make HTTP calls to the Ollama API
import json # For JSON parsing
import ollama # (Optional) The Ollama Python client – not used in this snippet
# ----------------------------------------------------
# Page setup
# ----------------------------------------------------
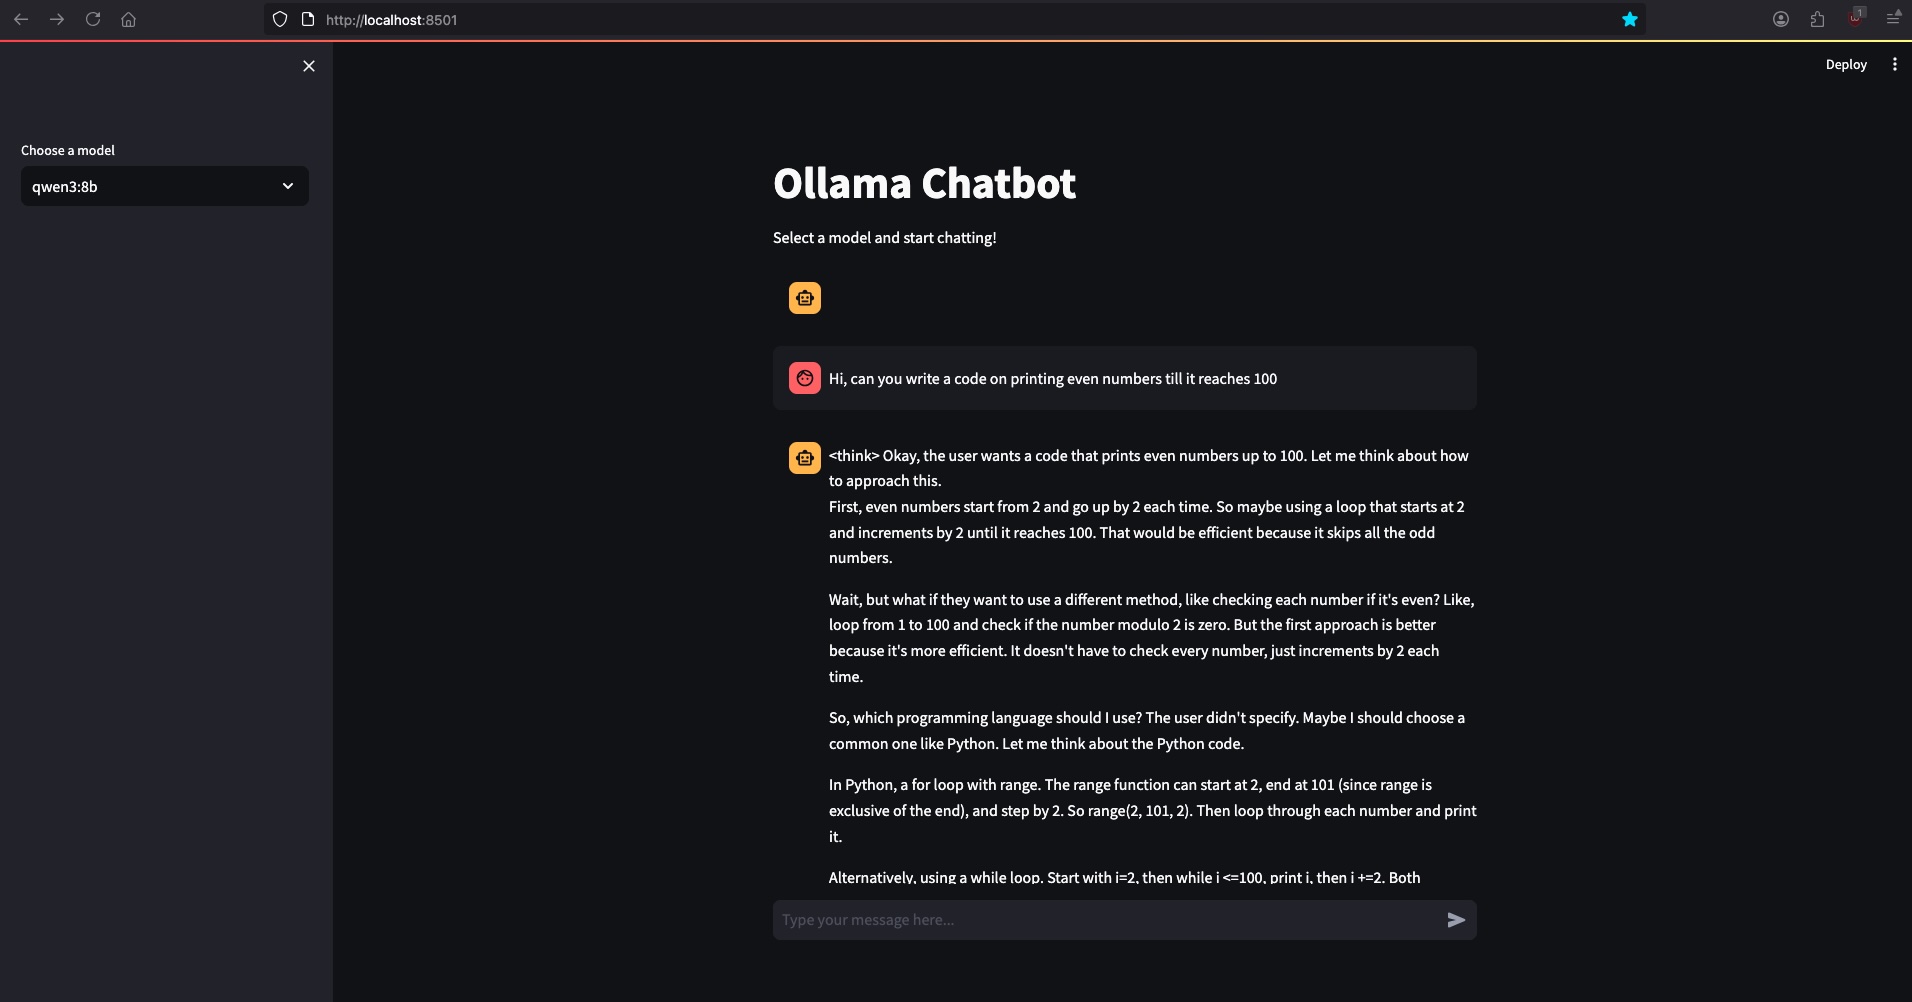
st.title("Ollama Chatbot") # Page title shown at the top
st.write("Select a model and start chatting!") # Short instructions for the user
# ----------------------------------------------------
# Sidebar: model selection
# ----------------------------------------------------
# List of models that are available locally in your Ollama installation
model_options = ["qwen3:8b", "deepseek-r1:latest", "gpt-oss:20b"]
# Create a drop‑down in the sidebar so the user can pick a model.
# The selected value is stored in `selected_model`
selected_model = st.sidebar.selectbox("Choose a model", model_options)
# ----------------------------------------------------
# Function that talks to the Ollama API
# ----------------------------------------------------
def call_ollama_model(prompt):
"""
Sends a prompt to the Ollama local server and streams back the
model's answer line‑by‑line.
"""
try:
# POST to the local Ollama generation endpoint.
# - "model": name of the model to use (selected by the user)
# - "prompt": the user’s question
# - "stream": tells Ollama to stream partial responses
response = requests.post(
"http://localhost:11434/api/generate",
json={"model": selected_model, "prompt": prompt, "stream": True},
stream=True # Keep the HTTP connection open for streaming
)
output = "" # Accumulate the full response here
# Iterate over each line that the API yields.
for line in response.iter_lines():
if line: # Non‑empty line
# Each line is a JSON blob containing a part of the answer
data = json.loads(line.decode('utf‑8'))
# Append the partial answer to the running total
output += data.get("response", "")
# Yield the current state so the UI can update progressively
yield output
return
except Exception as e:
# If anything goes wrong, show an error inside the Streamlit app
st.error(f"Error calling Ollama API: {e}")
return None
# ----------------------------------------------------
# Session state: keep the chat history
# ----------------------------------------------------
# `st.session_state` persists across reruns – perfect for chat memory.
if "messages" not in st.session_state:
st.session_state.messages = [] # List of dicts with keys: role, content
# ----------------------------------------------------
# Render the existing chat history
# ----------------------------------------------------
for msg in st.session_state.messages:
with st.chat_message(msg["role"]): # `st.chat_message` provides a nice bubble UI
st.markdown(msg["content"]) # Display the message text
# ----------------------------------------------------
# User input: ask a new question
# ----------------------------------------------------
# `st.chat_input` automatically creates an input box in the chat layout.
if prompt := st.chat_input("Type your message here..."):
# Append the user message to the session state
st.session_state.messages.append({"role": "user", "content": prompt})
# Show the user’s message immediately
with st.chat_message("user"):
st.markdown(prompt)
# ----------------------------------------------------
# Get and display the assistant’s reply
# ----------------------------------------------------
with st.chat_message("assistant"):
# `st.empty()` gives us a placeholder we can update inside the loop
response_box = st.empty()
full_response = ""
# Call the API – we iterate over partial results to stream them.
for partial in call_ollama_model(prompt):
full_response = partial # Keep the latest full string
response_box.markdown(full_response) # Update the UI in real time
# After streaming finishes, store the full answer in session state
st.session_state.messages.append({"role": "assistant", "content": full_response})
Run the UI
streamlit run chat_with_ollama.py
Open the URL that Streamlit prints (usually http://localhost:8501). Pick gpt-oss:20b from the sidebar and start chatting. You’ll see the assistant stream its output as it’s generated—exactly like the official OpenAI chat.
4. Exploring More Models
Ollama’s public library hosts dozens of models: LLaMA, Mistral, Qwen, and many more. Browse them at the official Ollama Library (the link is a placeholder; replace with the real URL if needed).
ollama list          # View downloaded models
ollama show <model>  # See model metadata
ollama pull <model>  # Download a new one
Feel free to experiment with different sizes and architectures—just remember larger models may need more RAM or GPU VRAM.
5. Common Pitfalls & Troubleshooting
| Symptom | Likely Cause | Fix |
|---|---|---|
| Docker container dies immediately | Missing GPU runtime or incorrect image tag | Verify --gpus=all (NVIDIA) or :rocm tag (AMD). |
requests times out |
Ollama not listening on port 11434 | Check docker ps and docker logs ollama. |
| Low GPU memory usage | Model not actually using GPU | Ensure you ran docker run with --gpus=all. |
| “Model not found” error | Model name typo or not yet pulled | Use ollama pull <model> first. |
6. Take‑away
You now have a fully local, end‑to‑end ChatGPT‑like stack:
- Ollama runs a GPU‑accelerated inference server.
- The gpt‑oss:20b model is your powerful, open‑source LLM.
- Streamlit gives you a polished UI that streams responses.
All of this runs on a single machine—no cloud provider, no API key, no billing. Drop in your own prompts, fine‑tune the model, or integrate it into a larger application. The sky’s the limit.
Happy chatting! 🚀